
One of our OTTC, Jen, from Snaps + Sprouts Photography is sharing her tutorial for these amazing tissue paper flowers today!

Materials Needed:
Plaster of Paris
Chicken wire
Tissue Paper
Floral Wire
Scotch Tape
Wire Cutters
Plastic Cups
Duct Tape
Work Gloves
Zip Ties
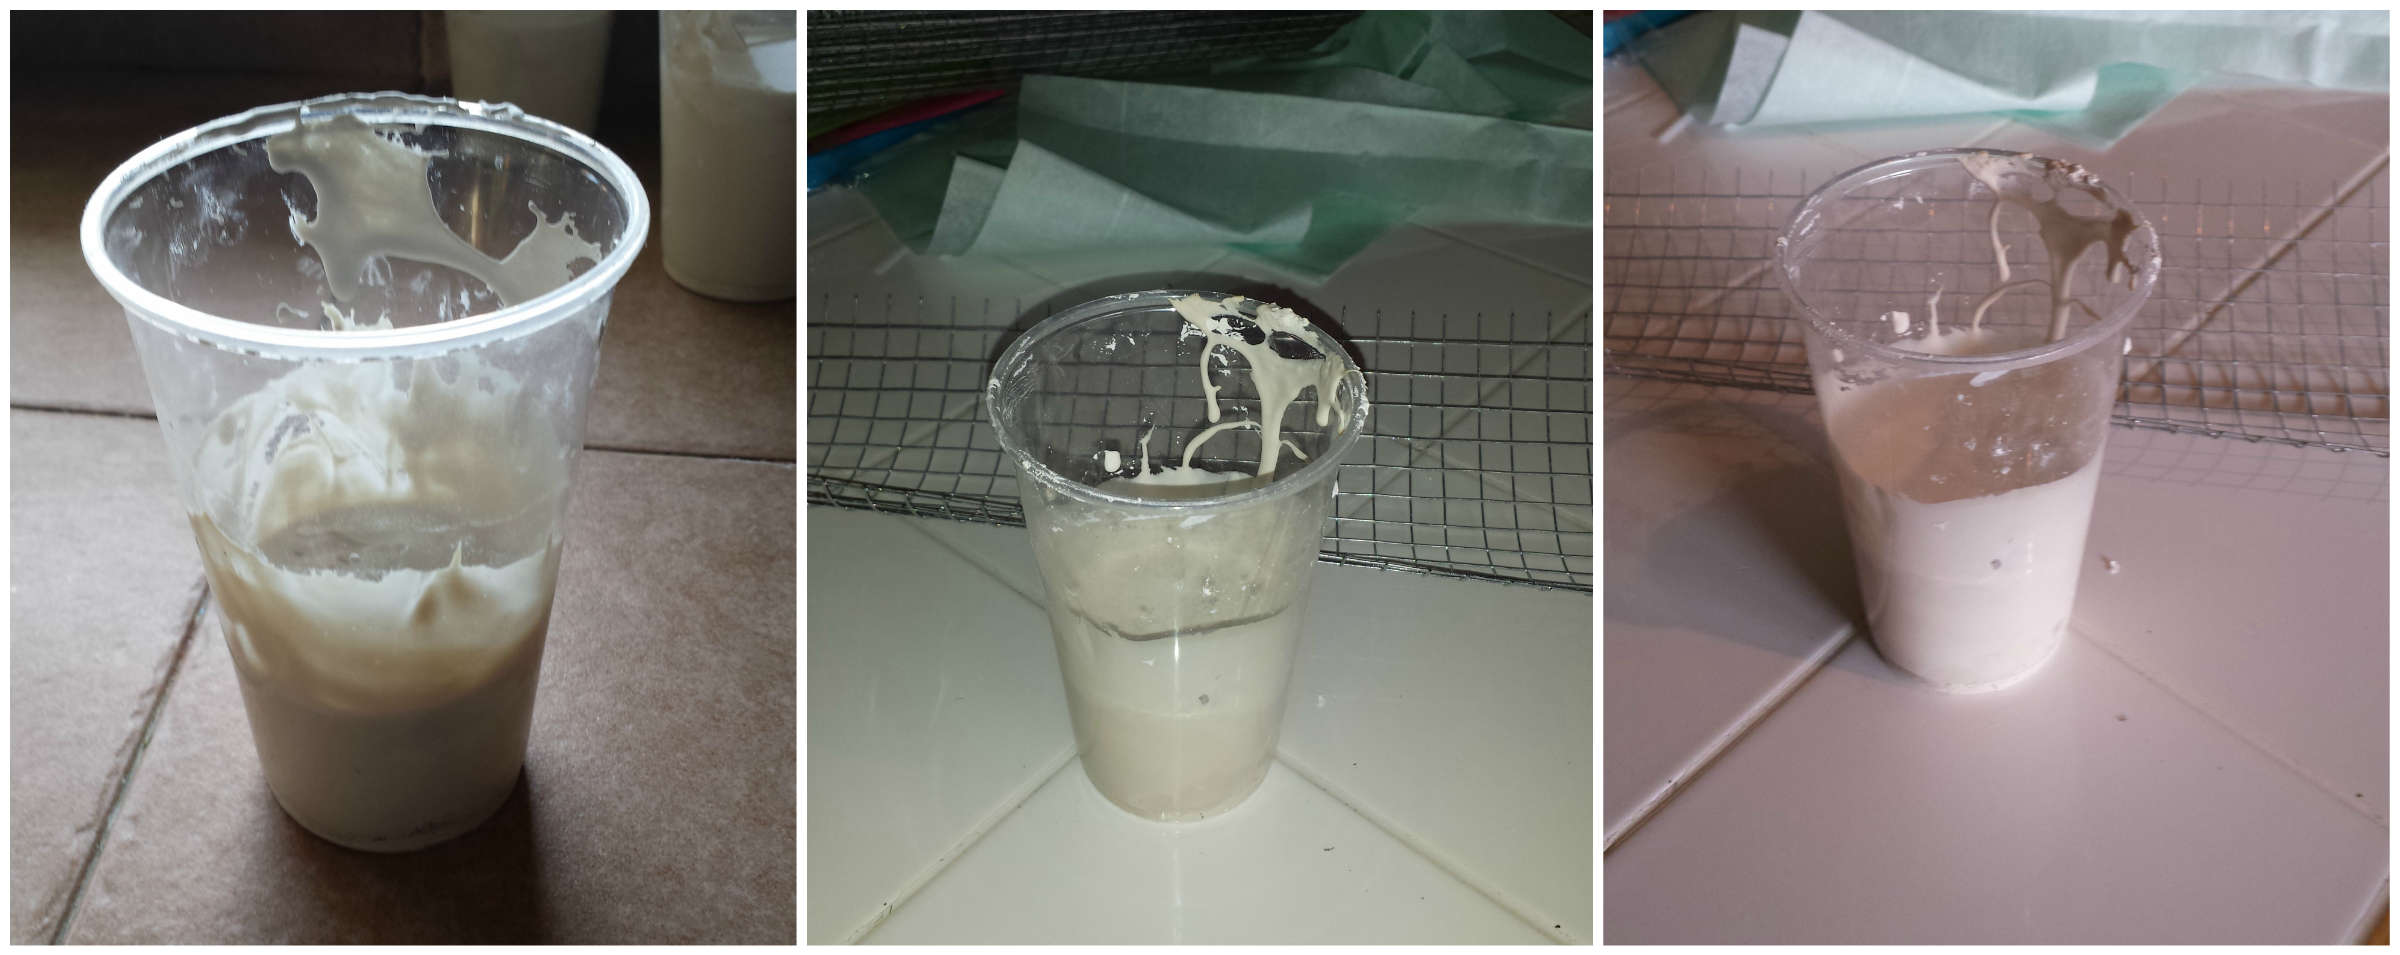
Step 1 – Fill plastic cups (I used 12oz plastic drink cups, feel free to break out your red solo cups or whatever fits your fancy) about 3/4 full with Plaster of Paris mixture. You could totally use whatever you have handy, cement etc… just make sure that it is going to give weight to the cup. This is your flower base and you will cry later if it tips over easily.
Step 2 – Let the mixture set. Have a glass of wine, and catch up on the Thrifty Tog Blog while you wait.
Step 3 – Once the mixture has hardened, you are going to take your chicken wire and cut it to your desired length and width. I did varying sizes but you could also do all one size, or go even taller than I did. I just went with the flow. Once I had the wire where I wanted it I used a zip tie to hold it together.
*This is where if you have the work gloves, I would put them on. Chicken wire is pokey!
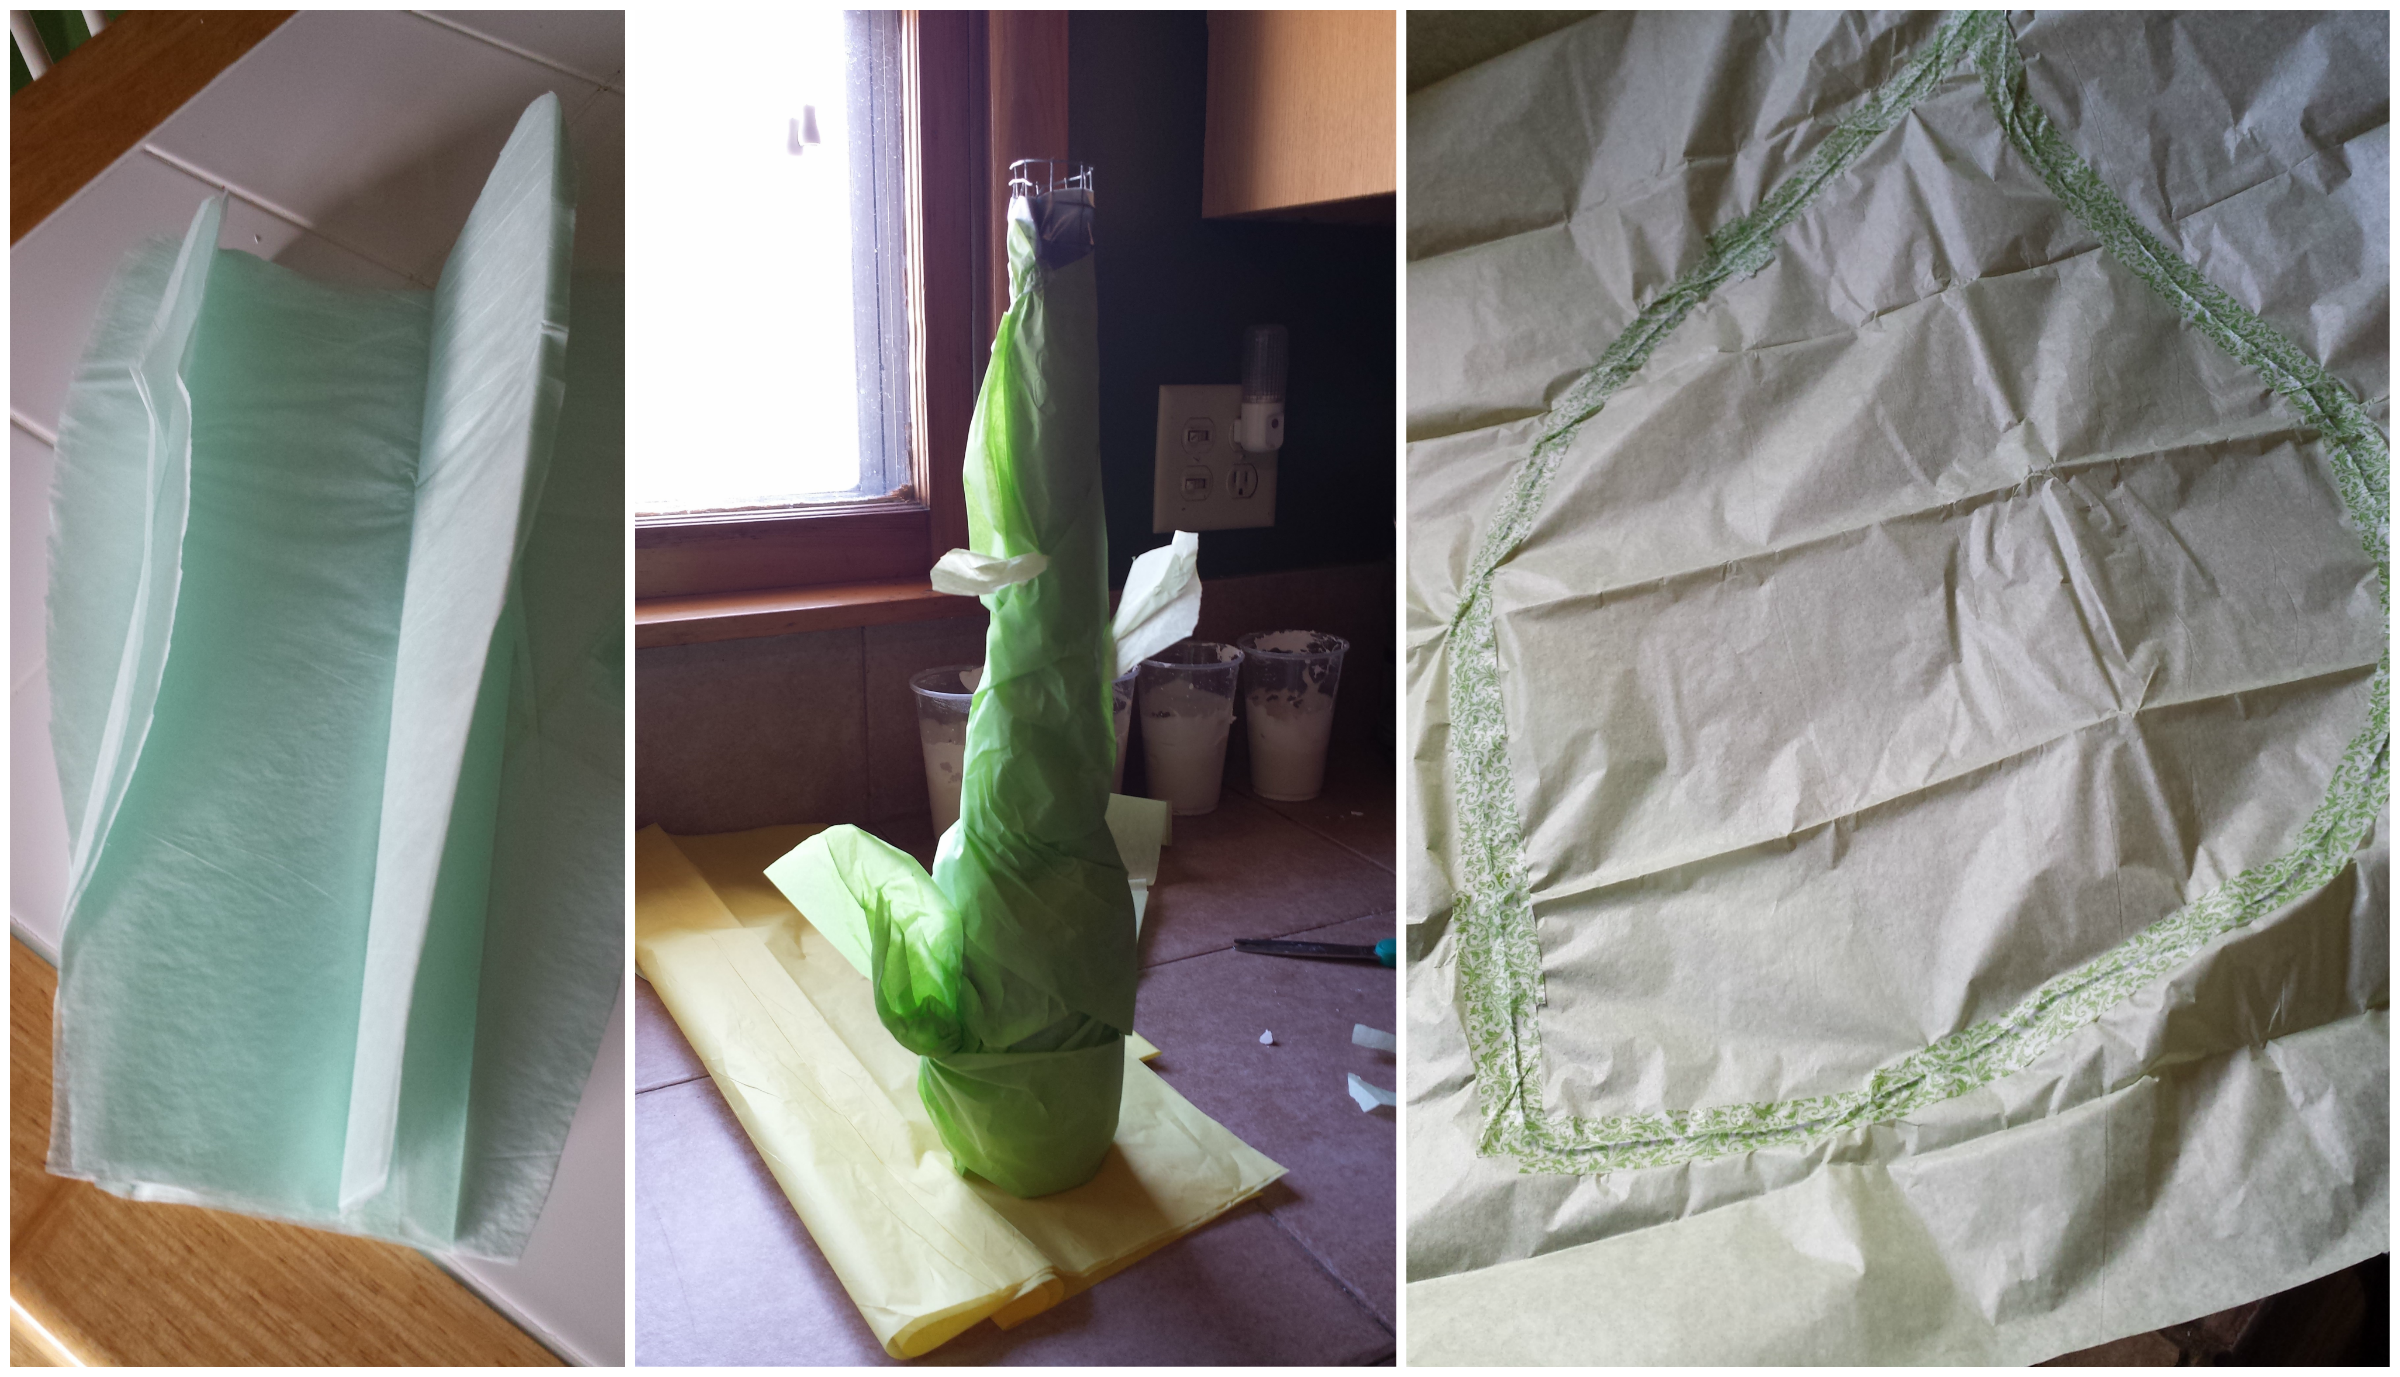
Step 4 – After you have the wire attached. Bring out the almighty duct tape. Wrap that stem up! Use as much duct tape as you think you need. I went through 2 rolls. (I covered all the ends that poked through. If you can snip off at the edge and avoid the pokies.) 🙂

Step 5 – Tissue wrap the stem. I used 2 different colors of green tissue paper (I purchased a large package of rainbow tissue at Wal-Mart, and then also found additional softer colors at our local Hobby Lobby. The Hallmark Stores would be a good place to check out as well, they always have super fun tissue. For 1 flower, I made a leaf by using some floral wire and adhering it to the tissue using green washi tape. It looked pretty cool! I also made additional leaves on the other stems by just bending and taping tissue paper. You will be surprised at how well they actually stand up. I was a bit wary that they were going to droop or appear funny, but in the month(ish) since I have made these they are still looking gorgeous in my studio window for a spring display.
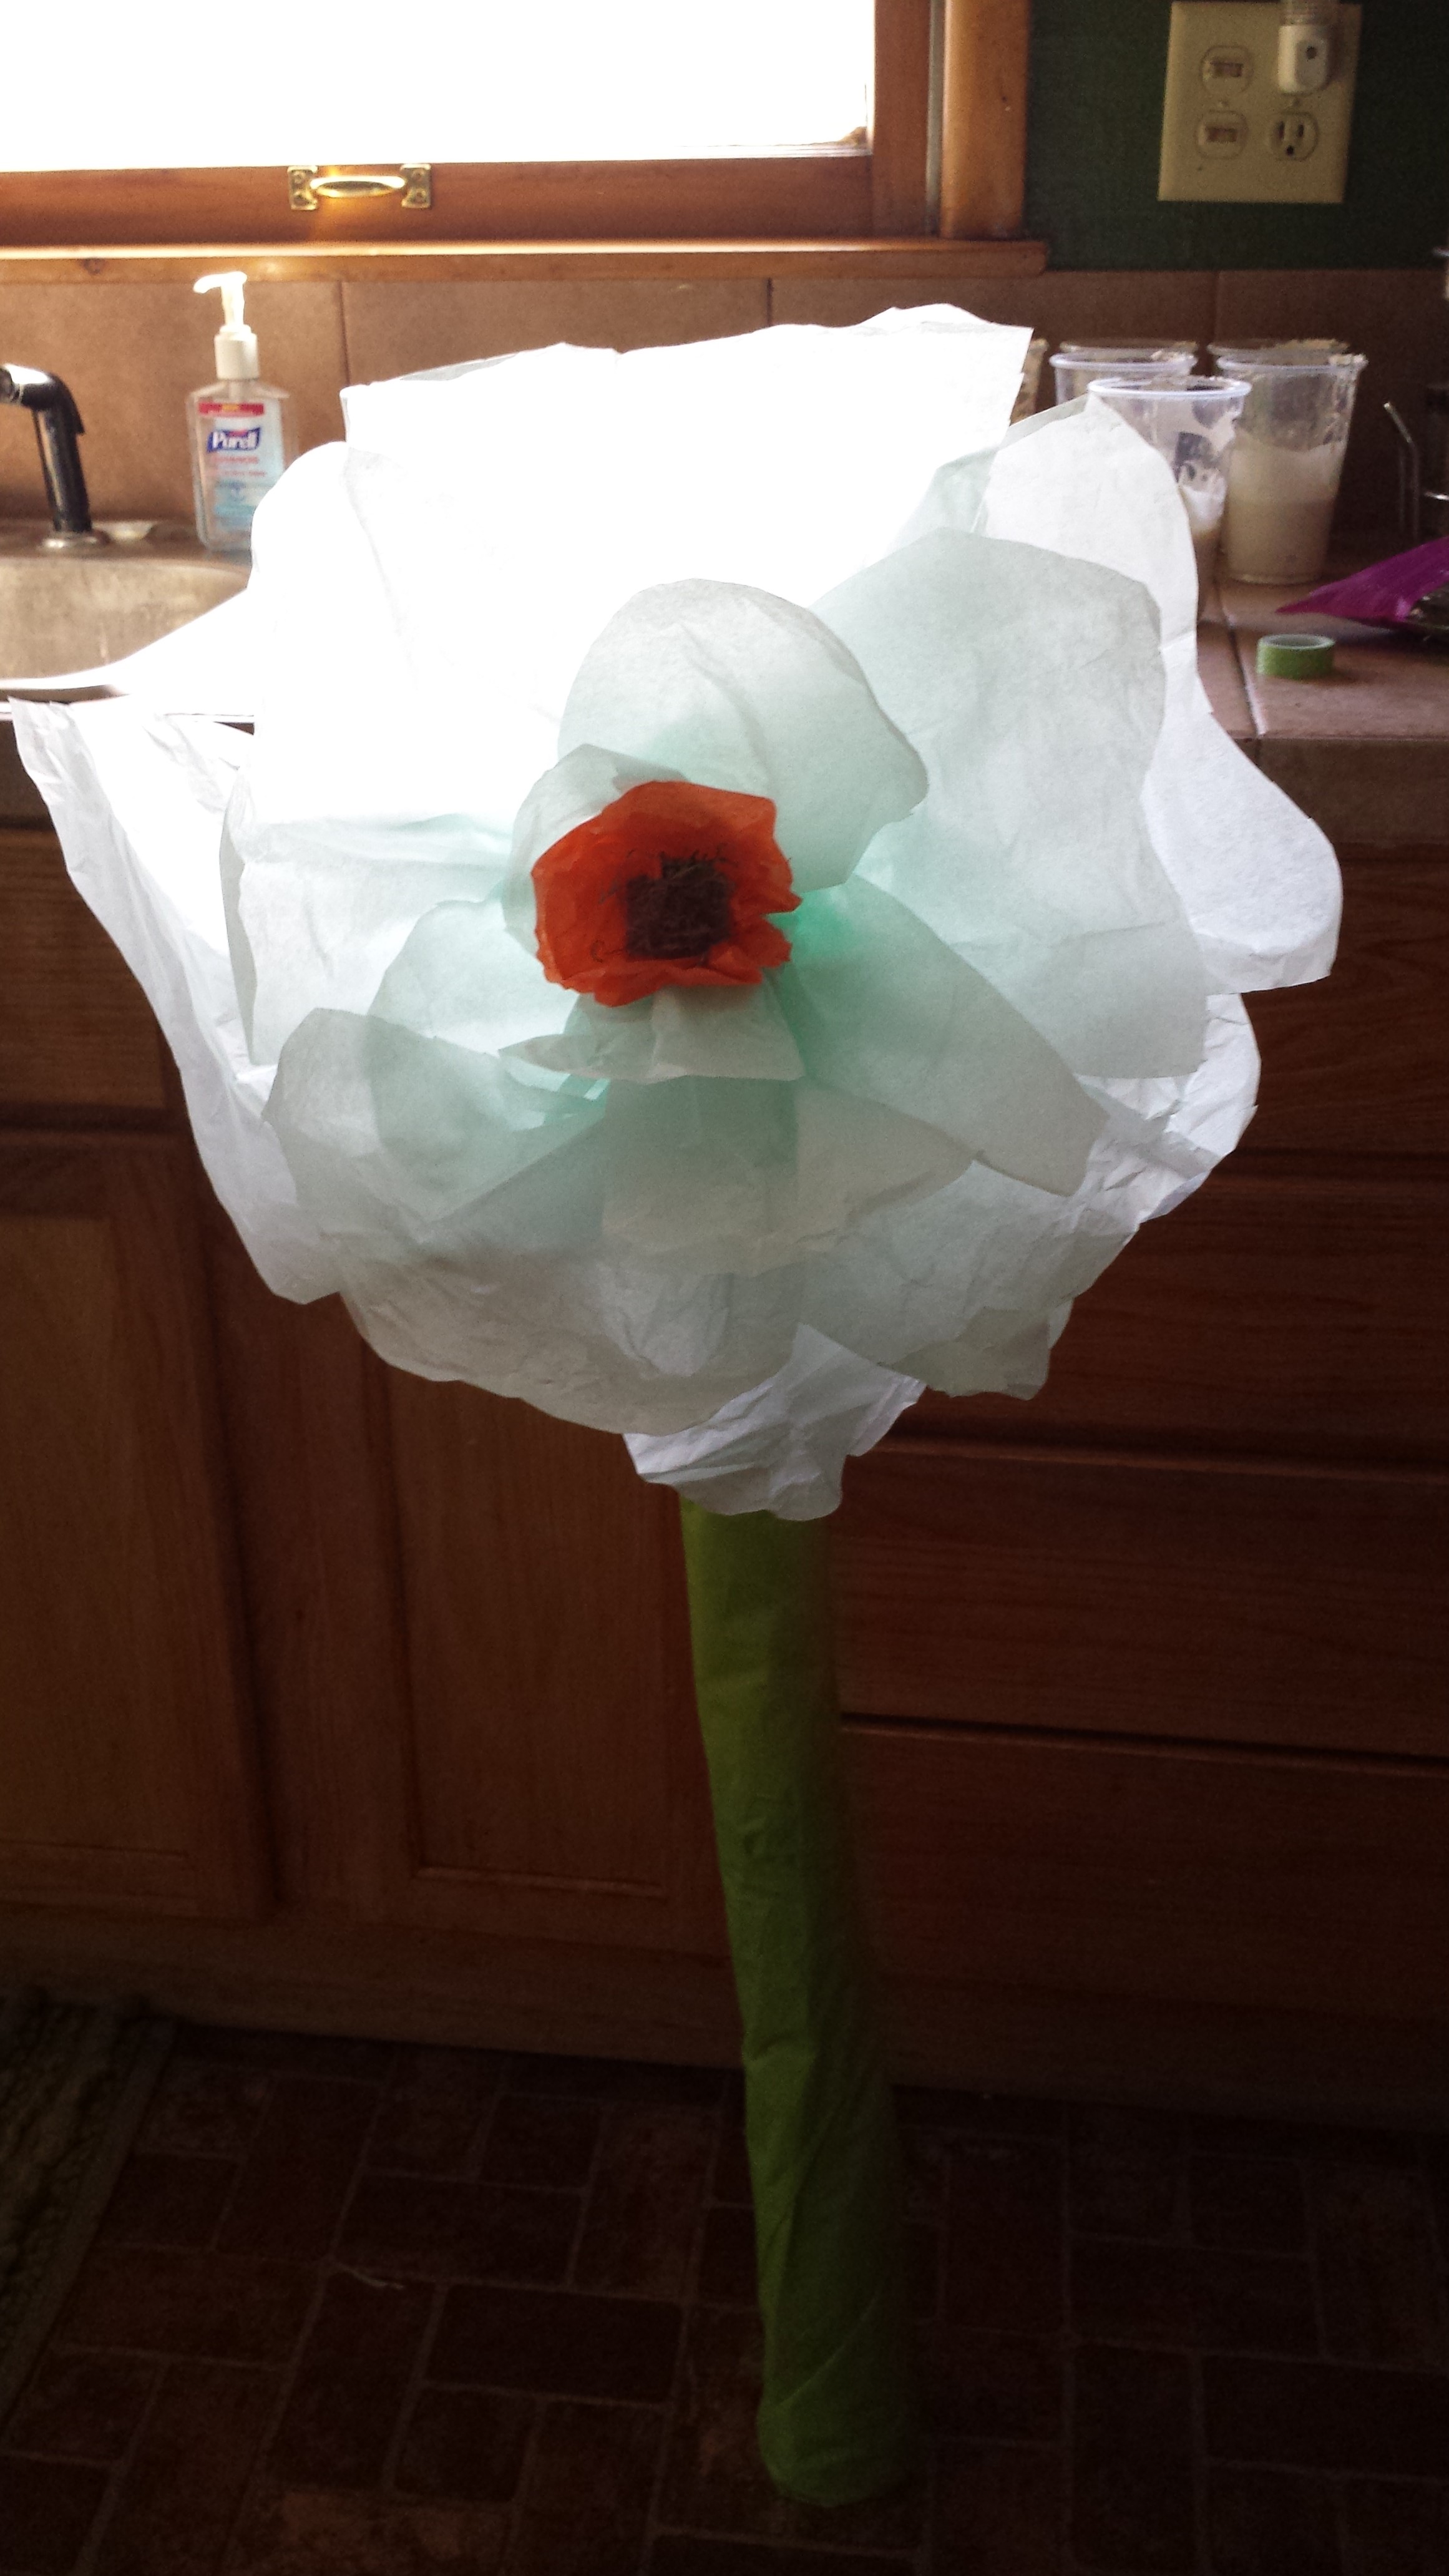
Step 6 – After you have the stems wrapped this is when the flower part begins. At first I started by using my precision skills to try and make each petal identical. This lasted for about 10 minutes. My 5 year old daughter and I found it to be much easier, and much more fun to cut a general petal shape in different sizes and just build the flower all willy nilly wild and free rather than trying to make each one just so. End result, I love them more because of it.
Step 7 – Once you have your flower all put together (Start largest petals on the bottom and layer multiple smaller layers until you are satisfied with the size and shape of your bloom. You will then (this is the most complicated part in my opinion because a 2nd set of hands, larger than 5yo hands, would definitely come in handy) twist the back of the bloom into a stem of its own. Zip tie this TIGHT. You will then use another zip tie to attach the flower to the stem.

Step 8 – Finishing touches: I added a small bit of orange or yellow to the center of the flower and then glued that along with some dried peat moss. I also bent the stems around and twisted them a bit to get another fun unique look for each flower.
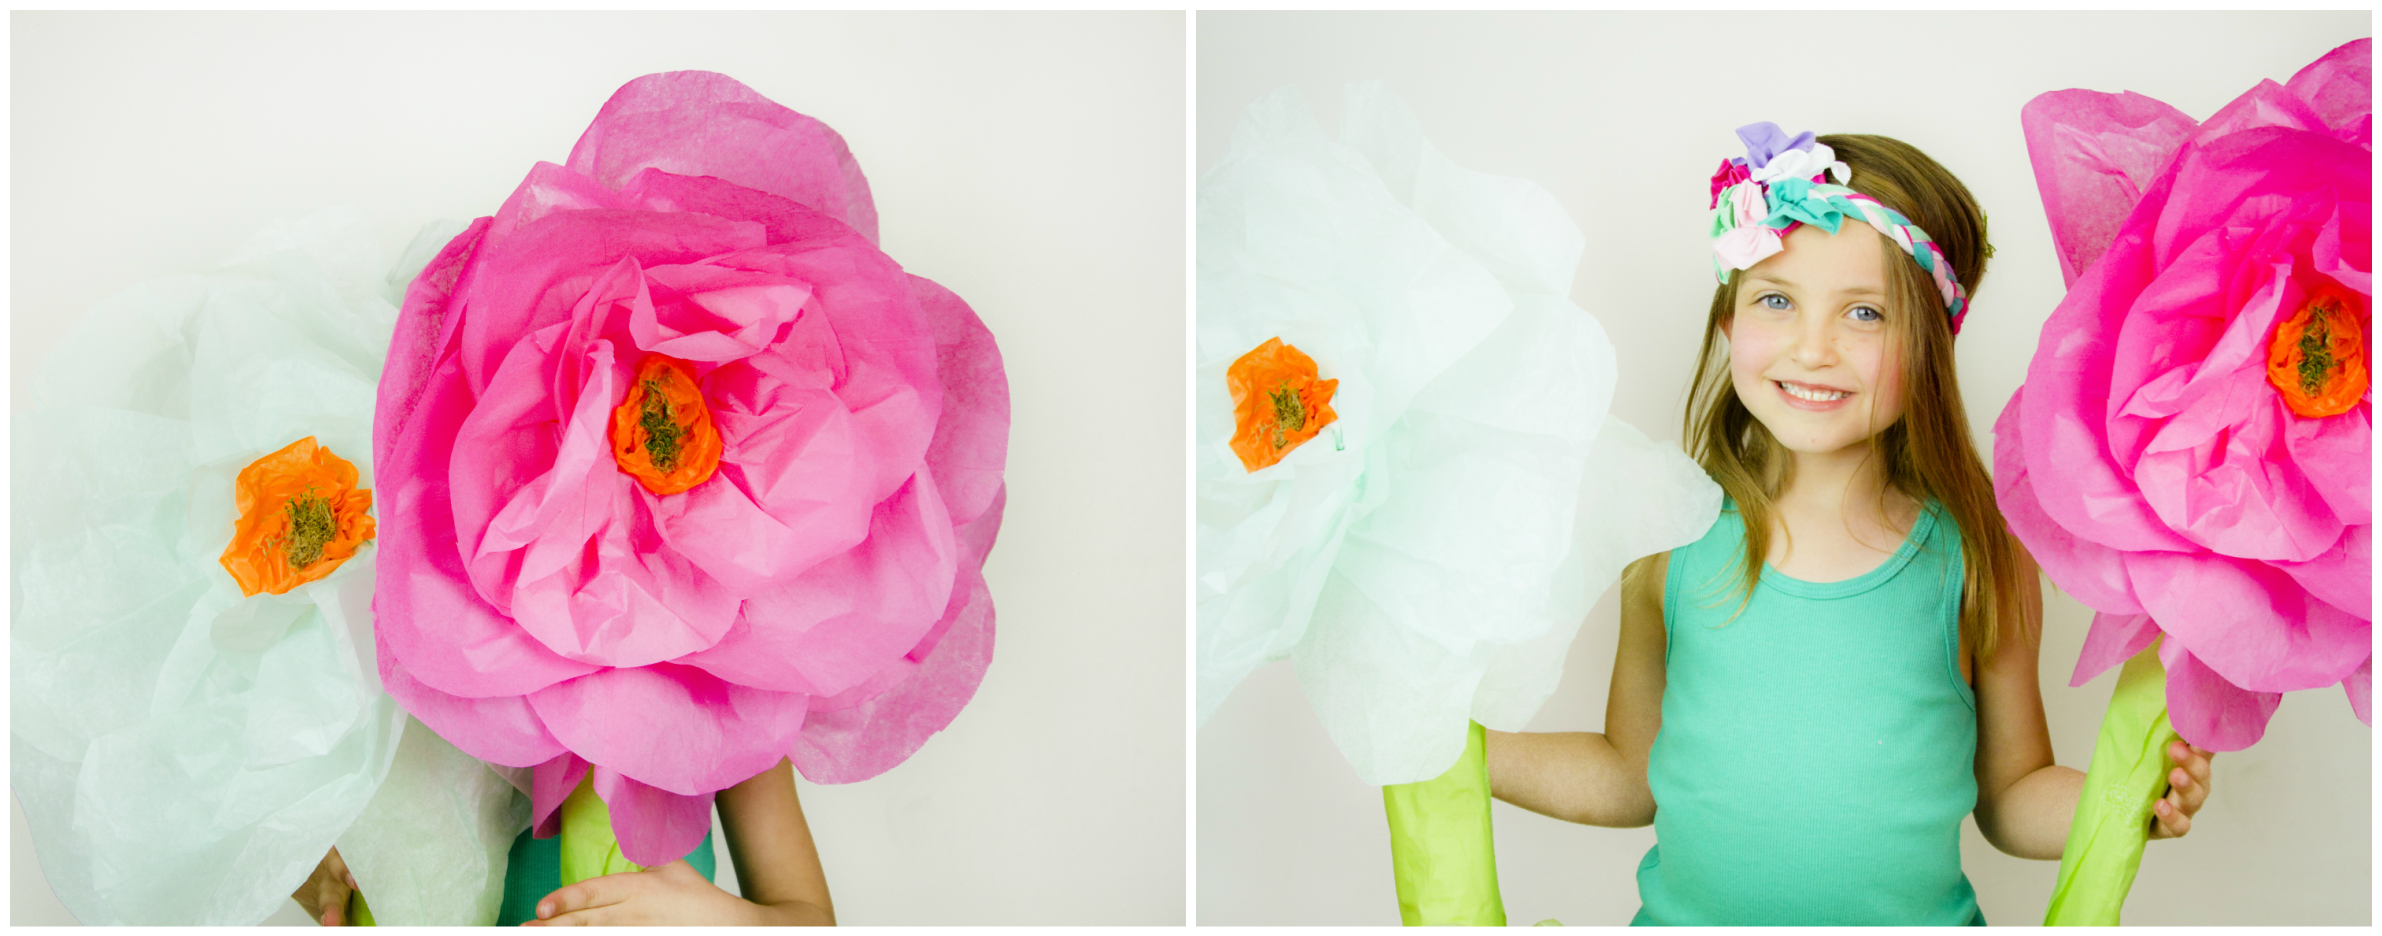
Step 9 – Enjoy your beautiful Tissue Paper Flowers!!
Total cost – Approximately $30.00
(Plaster of Paris, and chicken wire were the bulk of this cost. I also have quite a bit of each left over for future TTB projects. I also will not be purchasing tissue paper anytime in the near future.)
Window display at the Snaps + Sprouts Studio

Thanks Jen for another awesome tutorial! We’d love to see your flowers.. comment with a link and we will check them out!

This is really good idea! 🙂
Keep up the great work!
xx,
Isabella
LikeLike
We used to make these when we were kids. Ahhhh…so many memories.
LikeLike